

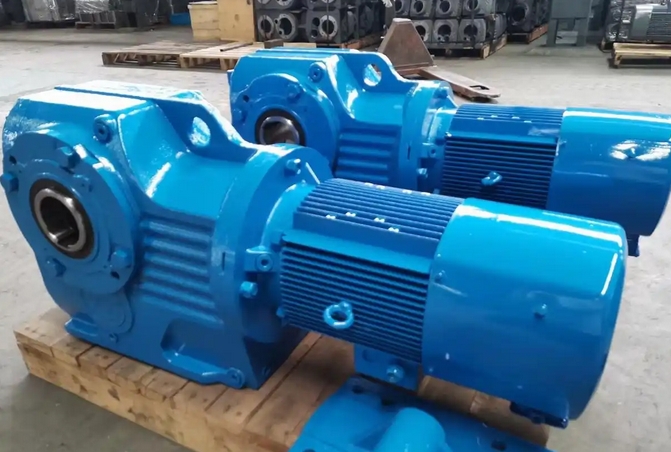
How to install a 2.2KW motor with a KA47-25.91 gear reducer
The installation steps for a 2.2KW motor and KA47-25.91 gear reducer are as follows:Pre installation inspection: Confirm that the motor and reducer are intact and undamaged, and strictly check whether the dimensions of each part connected to the motor and reducer match, mainly including the dimensions of the motor's boss, input shaft, and reducer groove, as well as the fitting tolerance. At the same time, clean the connection between the motor shaft and the reducer, wipe off the anti rust oil on the motor output shaft, positioning boss, and reducer connection with gasoline or zinc sodium water, ensure the tightness of the connection and the flexibility of operation, and prevent unnecessary wear.
Adjusting the reducer: Unscrew the screws on the outer side of the reducer flange, insert an Allen wrench to remove the dust cover from the process hole on the outer side of the reducer flange, adjust the elastic clamping device of the reducer input shaft to align the fastening bolt with the process hole, insert an Allen wrench to loosen and tighten the Allen screw.
Connect the motor and reducer: Connect the motor and reducer naturally, and do not knock them. Ensure that the coaxiality between the motor output shaft and the gearbox input shaft is consistent, and that the outer flanges of both are parallel. Inconsistent alignment or non parallel flanges on both sides can cause the motor shaft to break or the gear of the reducer to wear. Connect it properly and prepare to install the screws. Before connecting the motor to the reducer, align the reducer locking screws with the process holes to facilitate wrench intervention.
Locking fixing screws: To ensure even force distribution, first tighten the installation screws at any diagonal position, but do not tighten them. Then tighten the installation screws at the other two diagonal positions, and finally tighten the four installation screws one by one. For the clamping screws of the gearbox (usually two), it is necessary to gradually apply force and lock them evenly.
Installation process screws: Install process screws to achieve better protection levels.
Overall installation and fixation: Install the installed motor and reducer in the required position as a whole, and tighten and fix them with a wrench. Ensure that the installation position of the reducer matches the instructions on its label and is securely fixed. Meanwhile, the motor should be installed on a sturdy foundation to avoid abnormal sounds and vibrations during operation.
Wiring: Connect the motor's junction box to the power supply correctly, pay attention to the correctness and firmness of the wiring, and ensure that the motor can operate normally when powered on.
After installation, it is necessary to check the installation status of each part according to the prescribed installation requirements to ensure that the staff can easily access the oil gauge, vent plug, drain plug, etc. In addition, it is necessary to check the oil level, add lubricating oil as required, and conduct a no-load test run for no less than 2 hours. The operation should be smooth, without impact, vibration, noise, or oil leakage. Any abnormalities should be promptly eliminated.


